So, you’ve got a Boston fern and want to keep it looking its best? It’s totally doable, even if you’re new to plants. These leafy beauties add a nice touch to any room, but they do have a few quirks. Getting the hang of their light, water, and humidity needs is the main thing. This guide breaks down the essentials of Boston fern plant care to help yours thrive.
Key Takeaways
- Boston ferns prefer bright, indirect light. Avoid direct sun, which can scorch their fronds, but also make sure they get enough light or they might yellow and stop growing.
- Keep the soil consistently moist but not waterlogged. Check the top inch of soil; water when it feels a bit dry. Overwatering can lead to mushy leaves and root rot.
- These ferns love humidity and moderate temperatures, ideally between 65-75°F during the day and a bit cooler at night. Protect them from cold drafts and heat sources.
- Use a well-draining, peat-based soil mix. Feed your Boston fern with a diluted liquid fertilizer twice a year during spring and summer, but skip it in winter.
- Trim off any dead or brown fronds to keep the plant tidy. For a bushier look, you can prune back some of the side fronds.
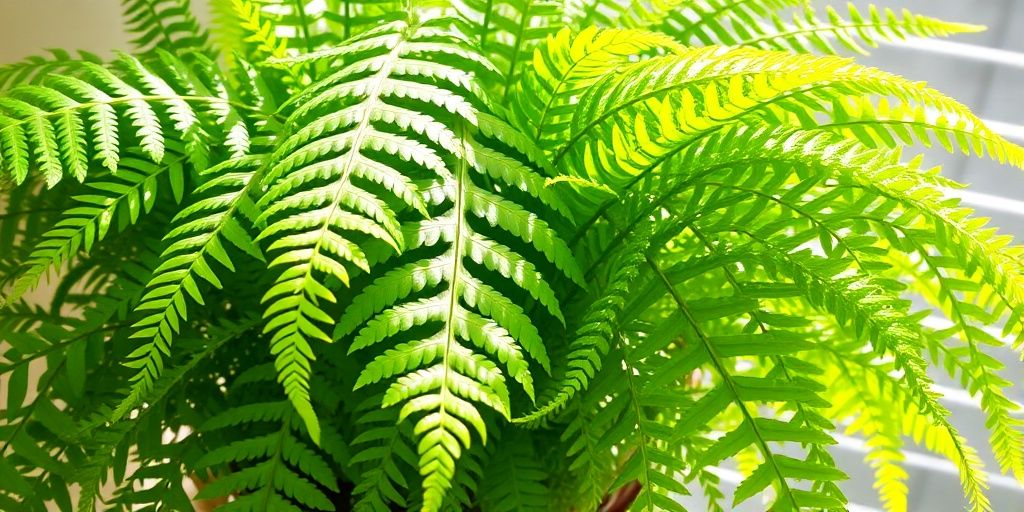
Understanding Boston Fern Light Needs
Boston ferns are tropical plants, and like many of their jungle cousins, they really appreciate a good amount of light, but not the harsh, direct kind. Think of it like this: they like to be in a bright room, but not sitting right in the window where the sun beats down all afternoon. A spot near a north or east-facing window is usually a good bet, or maybe a bit further back from a south or west window. If you can see dappled light coming through, that’s often just right.
Too much direct sun is the quickest way to unhappy Boston fern fronds. They’ll start to look scorched, brown, and crispy. On the flip side, if your fern isn’t getting enough light, you’ll notice it. The fronds might not unfurl properly, or they could start to look a bit pale and dull. Growth will also slow down considerably. It’s a balancing act, for sure.
Here’s a quick rundown of what to look for:
- Good Light: Bright, but filtered or indirect. Think of the light on a slightly overcast day, or the light that makes it through sheer curtains.
- Too Much Sun: Direct, harsh rays, especially during the hottest parts of the day. This will cause browning and crisping.
- Too Little Light: Slow growth, pale or yellowing fronds, and fronds that don’t open up fully.
If you’re unsure about your light situation, try placing your fern in a few different spots for a week or two each. Observe how it responds. You’ll get a feel for what it likes best.
Sometimes, especially in winter when the days are shorter, you might need to supplement with a grow light if your natural light just isn’t cutting it. Just make sure it’s not too close or too intense.
Mastering Boston Fern Watering Techniques
Watering your Boston fern correctly is key to keeping its fronds lush and green. These ferns really don’t like to dry out, but they also hate sitting in soggy soil. It’s a bit of a balancing act, but once you get the hang of it, your fern will thank you.
Maintaining Consistent Soil Moisture
The goal is to keep the soil evenly moist, like a wrung-out sponge. This means checking the soil regularly. Stick your finger about an inch or two into the soil. If it feels dry at that depth, it’s time to water. During warmer months or if your home is particularly dry, you might need to water more often, maybe every few days. In cooler, more humid months, you can probably stretch that out to once a week or even a bit longer. Just always check the soil first before you water.
Watering From Top or Bottom
Both methods work, but there are a few things to keep in mind.
- Top Watering: When you water from the top, try to water the soil directly and avoid getting the fronds wet. Water splashes on the leaves can sometimes lead to fungal issues. So, aim your watering can at the base of the plant.
- Bottom Watering: This is a great way to ensure the soil gets evenly moist without making the top soggy. Just place the pot in a tray or sink filled with a few inches of water. Let it sit there until the top of the soil feels damp. Then, take it out and let any excess water drain away. This method is particularly good for preventing those fungal problems.
Recognizing Overwatering Symptoms
It’s easy to accidentally overwater a Boston fern, especially if you’re watering on a strict schedule. Watch out for these signs:
- Yellowing or browning leaves: While some browning can mean it’s too dry, if the leaves are also soft and limp, it might be overwatering.
- Mushy fronds: The leaves might feel soft and droopy, almost like they’re wilting from too much water.
- Foul odor from the soil: This is a big one. If the soil smells like it’s rotting, the roots are likely suffering from too much moisture.
If you notice your Boston fern’s leaves are turning yellow and feel soft, it’s a strong indicator that you’re giving it too much water. It’s better to let the soil dry out a bit than to keep it constantly saturated. Remember, consistency is key, but that consistency should be in checking the soil, not in a rigid watering schedule. A happy Boston fern loves consistently moist soil.
Creating the Perfect Temperature and Humidity
Read Also: ZZ Plant Care Indoors: Low-Light Plant Tips
Boston ferns are tropical plants, so they really like it warm and humid. Think of the environment they’d naturally grow in – a steamy jungle floor, maybe? That’s the vibe we’re going for indoors.
Optimal Temperature Ranges
These ferns are pretty happy in typical home temperatures. During the day, aim for somewhere between 65°F and 75°F. They can handle a bit cooler at night, dropping down to around 55°F, but don’t let them get too chilly. Anything below 50°F for too long is a no-go and can really stress the plant out. So, keep them away from drafty windows in winter or those super cold spots near doors.
Boosting Indoor Humidity
This is where most people run into trouble. Our homes are usually way drier than a fern’s happy place, especially in winter when the heat is on. You’ve got a few options here:
- Misting: You can mist the fronds with room-temperature water once or twice a day. It’s a quick fix, but you have to be consistent.
- Pebble Tray: Fill a shallow tray with pebbles and water. Set the pot on top of the pebbles, making sure the bottom of the pot isn’t sitting directly in the water. As the water evaporates, it raises the humidity around the plant.
- Humidifier: For the best results, especially if you have a lot of plants or your home is very dry, a small room humidifier is a game-changer. It keeps the air moist without you having to constantly fuss.
Remember, while Boston ferns love humidity, you don’t want to create a swamp. Good air circulation is still important to prevent any mold or fungal issues.
Protecting From Drafts and Heat
Just like they don’t like being too cold, they also don’t appreciate sudden blasts of hot air. Keep your Boston fern away from heating vents, fireplaces, or even direct heat from appliances. Also, be mindful of air conditioning vents in the summer – a constant stream of cold, dry air can be just as damaging as a winter draft. Finding a spot with consistent conditions is key to a happy Boston fern.
Choosing the Right Soil and Fertilizing
Choosing the right soil and feeding your Boston fern are pretty important steps to keep it looking its best. Think of it like giving your plant the right kind of food and a comfy bed. Get it wrong, and you’ll start seeing sad, brown fronds.
Ideal Soil Mix for Boston Ferns
Boston ferns really like soil that holds onto some moisture but also lets extra water drain away easily. They don’t want their roots sitting in soggy puddles, that’s a recipe for rot. A good mix usually involves a peat-based potting soil. You can make it even better by adding some perlite or coarse sand to help with drainage. Some people also like to mix in a bit of compost for extra nutrients. Aim for a soil that’s a bit acidic, with a pH around 5 to 5.5.
Here’s a simple recipe for a good soil mix:
- 2 parts peat moss
- 1 part perlite
- 1 part compost
Fertilizing During the Growing Season
When your fern is actively growing, usually from spring through summer, it appreciates a little food. You can use a balanced liquid fertilizer made for houseplants. It’s best to dilute it to half the strength recommended on the package. Feed your fern about once a month during this active growing period. Always water the plant before you fertilize; applying fertilizer to dry soil can burn the roots.
When to Avoid Fertilizing
Don’t go overboard with the fertilizer. If you feed your fern too much, or too often, you’ll likely see the tips and edges of the fronds turn brown and crispy. This is a clear sign of fertilizer burn. Also, when your fern isn’t actively growing – typically during the fall and winter months – it doesn’t need any extra food. Hold off on fertilizing until you see new growth starting up again in the spring.
Over-fertilizing is a common mistake that can really harm your Boston fern. It’s better to under-fertilize than to over-fertilize. If you’re unsure, just use less. Your fern will thank you for it by staying green and healthy.
Pruning and Enhancing Bushiness
Keeping your Boston fern looking its best involves a bit of tidying up and encouraging it to grow thick and full. It’s not complicated, really. You just need to know what to look for.
Removing Dead or Discolored Fronds
Over time, you’ll notice some of the fronds, those leafy parts, might turn brown or yellow, or just look generally sad and lifeless. Don’t worry, this is normal. The best thing to do is just snip them off right at the base of the plant. Use clean scissors or pruning shears for this. It helps the plant put its energy into new growth instead of trying to revive old leaves. It also just makes the whole plant look a lot neater.
Encouraging Fuller Growth
Want a really bushy fern? You can actually prune it back a bit more aggressively to encourage it to branch out. Instead of just trimming the dead bits, you can cut back some of the longer, leggy side fronds. Think of it like giving the plant a haircut to make it grow in thicker. For really large ferns, especially if you’re growing them outside in milder climates, you can even cut them back quite a bit, maybe down to just a few inches from the soil. They might look a bit sparse for a while, but they usually bounce back strong in the spring.
Cleaning the Leaves
Ferns can collect dust on their fronds, which isn’t great for them and makes them look dull. A simple way to clean them is to give them a gentle misting with water. Then, you can take a soft, damp cloth and wipe down the leaves. It’s kind of like giving them a little shower, which they seem to appreciate. This not only cleans them but also helps boost the humidity around the plant, which they love.
Repotting Your Boston Fern
Boston ferns are pretty forgiving, but eventually, they do need a bigger home. Think of it like your favorite sweater – after a while, it just gets too snug! Repotting gives the roots more room to spread out and keeps the soil from getting too compacted, which is a big deal for these guys.
When to Repot
Generally, you’ll want to repot your Boston fern every year or two. The best time to do this is in the spring, right when it’s starting to wake up and grow again. Keep an eye out for a few signs that it’s time:
- Roots poking out of the drainage holes: This is a pretty clear sign the pot is too small.
- Water running straight through: If you water your fern and it just drains out immediately without the soil seeming to soak it up, the roots might have filled the pot.
- Slowed growth or wilting: Even with good care, if your fern seems to be struggling and not putting out new fronds like it used to, it might be root-bound.
- The plant looks top-heavy: If the fern is falling over its pot, it’s probably outgrown its space.
It’s also a good idea to repot a new Boston fern within the first year you bring it home, just to give it a fresh start in a suitable pot.
Choosing the Right Pot Size
When you repot, don’t go too crazy with a giant pot. A good rule of thumb is to choose a new pot that’s only about 2 inches larger in diameter than the current one. Going too big can actually cause problems, like the soil staying too wet for too long, which can lead to root rot. Make sure whatever pot you choose has drainage holes – this is non-negotiable for Boston ferns!
Bringing the Lushness Home
So, there you have it. Caring for a Boston fern might seem like a lot at first, but once you get the hang of it, it’s really not that complicated. Just remember the key things: bright, indirect light, keeping the soil moist but not soggy, and giving it a bit of extra humidity. These plants really do add a special touch to any room with their green, leafy fronds. Don’t be afraid to trim away any brown bits to keep them looking their best. With a little attention, your Boston fern can be a happy, healthy part of your home for a long time.
Frequently Asked Questions
What kind of light do Boston ferns need?
Boston ferns really like bright light, but not the kind that shines directly on them. Think of a spot where the sun is a bit hazy, like near a window with a thin curtain or in a room that gets sun for only part of the day. Too much direct sun can make their leaves turn brown and crispy.
How often should I water my Boston fern?
The best way to water a Boston fern is to keep its soil consistently damp, but not soaking wet. It’s like giving it a good drink when the top inch of soil feels a little dry. Avoid letting the soil dry out completely, especially when it’s warm, but also make sure it’s not sitting in water, which can cause problems.
How can I make sure my Boston fern has enough humidity?
Boston ferns love humidity! They do best in rooms that have moist air, like bathrooms with windows or kitchens. If your home is dry, you can help by misting the plant, using a humidifier, or placing its pot on a tray filled with pebbles and water. Just make sure the pot isn’t sitting directly in the water.
What are the best temperatures for a Boston fern?
Boston ferns prefer temperatures that are comfortable for us, usually between 65°F and 75°F during the day. They don’t like sudden cold drafts from windows or doors, or being too close to heat sources like fireplaces or vents. Keeping them in a stable, mild temperature is key.
How do I make my Boston fern bushier?
You can help your Boston fern grow bushier by trimming off any dead or brown fronds. If the plant is looking a bit leggy, you can also trim back some of the side fronds near the base. This encourages new growth and makes the plant look fuller.
When should I repot my Boston fern?
It’s a good idea to repot your Boston fern about every two years, or when you see roots growing out of the bottom of the pot. Choose a new pot that’s just a little bit bigger than the old one. Spring is usually the best time to do this when the plant is actively growing.